
-1.png)


Nobl9 just launched a GitHub Action in the GitHub Marketplace. Customers will be able to leverage the GitHub Action to ensure their SLOs are updated in Nobl9 whenever they make changes to their SLO definitions in source code.
The first step to understanding the reliability of your application is to build and monitor SLOs against your infrastructure and application metrics. Nobl9 can help you define and monitor your SLOs as it provides 18 data source integrations to pull in your data from some of the top monitor solutions available.
Once you have some of your SLOs set up, it’s time to start looking at SLOs as code. Nobl9 allows you to create and manage SLOs using YAML configuration files. This workflow allows you to define your SLOs in code and apply the changes using sloctl, the Nobl9 SLO command line tool. Even SLOs that you create in the SLO Wizard can be retrieved and edited as YAML files.
Having a way to update your SLO configurations using a CLI tool aligns with how organizations are currently managing their systems. However, how about making sure your SLOs are up to date every time you make changes to your repo? The SLOs defined in YAML can be checked in beside your code and take advantage of your repo versioning.
For customers using Nobl9 and GitHub Actions, I’m excited to announce this is super simple to set up.
With every build in your repo, you can make sure the associated app’s SLOs are also updated inside Nobl9. Alternatively, your SRE team could create a repo that only contains SLOs and manage them as code that way.
Getting Started
To enable the Nobl9 GitHub Action:
- Go to the GitHub Marketplace:
https://github.com/marketplace/actions/nobl9-sloctl-action - Click on “Use latest version” and copy the command
- Paste the snippet in your workflow .yml file at the appropriate step that makes sense in your build flow.
-name: Nobl9 sloctl configuration
-uses: nobl9/nobl9-action@v0.2.0 - Add the following secrets as described in the usage section at https://github.com/nobl9/nobl9-action
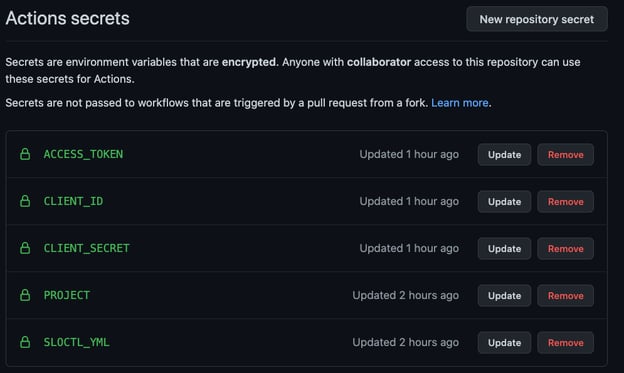
For information on how to create a client ID and client secret, see step 1 of the documentation here.
If you already have sloctl installed on you local machine you can retrieve your access token using this command:
cat ~/.config/nobl9/config.toml
Once that’s all set up, every build will update Nobl9 with your SLO YAML definition. With SLO as code, developers can easily add and modify their SLOs with each check in to ensure you’re always monitoring your products.
This GitHub Action works for all Nobl9 users. Check out Nobl9 Free Edition to get started.
Image Credit: Roman Synkevych
Share:


Do you want to add something? Leave a comment